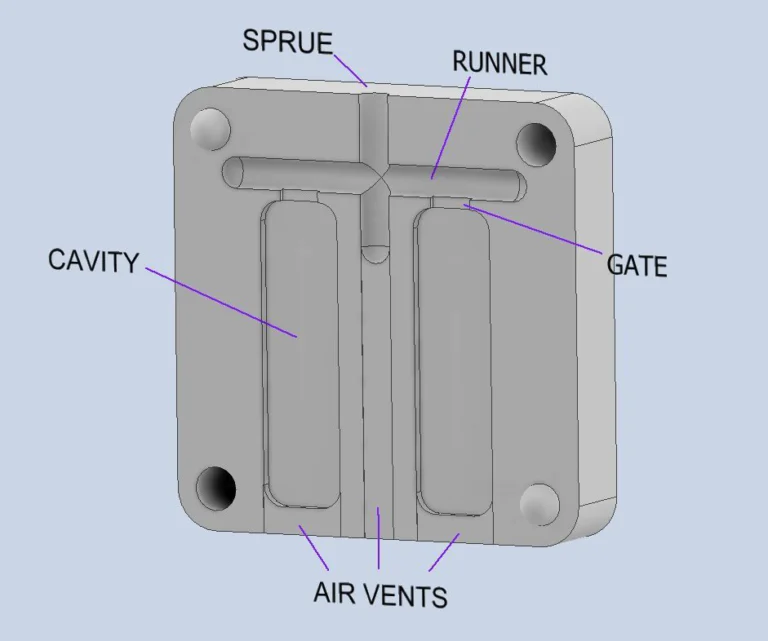
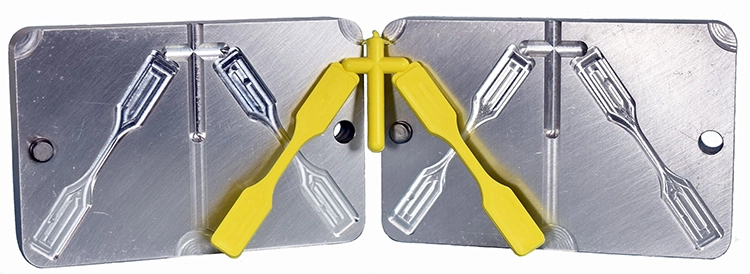
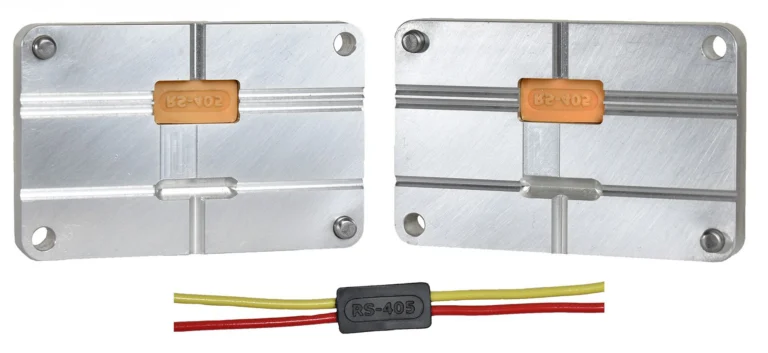
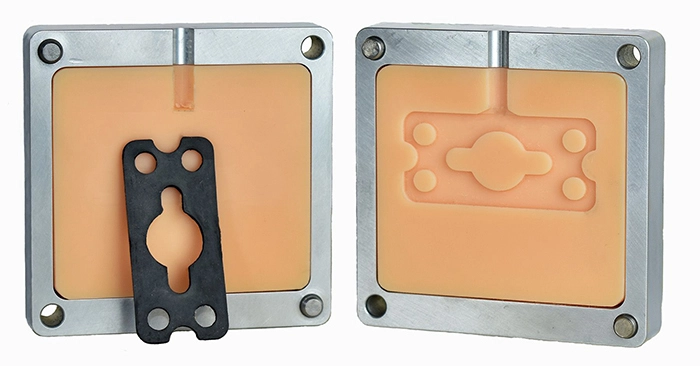
|
|
Benchtop Injection Molder |
||||||||||||
|
MOLDMAKING
There are two types of molds you can use with this machine: Epoxy molds and machined molds. Both are discussed below.
EPOXY MOLDS
Epoxy molds provide a low cost way for you to convert your hand-made models and prototypes into real plastic parts. You can make your original model from wood, metal, carving wax, random pieces of plastic glued together, or whatever combination of materials it takes to create the shape you want. That model can then be used to make the impression in your epoxy mold.
Epoxy molds are also ideal for reproducing injection molded parts. This is especially useful when you have an obsolete part that you can't buy new anymore. Or, an off-the-shelf part that must be modified slightly to meet your needs. Since the part was originally injection molded, it will already have a seam line where the mold halves came together, so you'll know exactly where to make the parting line for your epoxy mold.
There are numerous books, videos, and websites available on moldmaking, so learning how to do it is easily done. However, there are some things specific to injection molding that you probably won't find in a generic moldmaking how-to book or video. For example, how and where to make the plastic pathways (i.e. gates, runners, sprues), and where to locate the air vents. You can find that type of information by reading the books listed on the helpful links page.
Making an epoxy mold is easier if you use an aluminum master mold. A master mold is basically an aluminum frame. The inside of it serves as the cavity where you'll pour in the epoxy to make your mold. Master molds also have alignment pins and holes built into them, so the two halves always stay in exact alignment with each other. Once the epoxy is cured in the master frame, it can be removed, so you can use the master to make more molds. When you're ready to inject a part, you can return whichever epoxy mold you choose back into to the master frame.
CLICK HERE for step by step instructions on making an epoxy mold.
Machined molds are typically made from aluminum bar stock. The process starts by creating a CAD drawing of the plastic part you want to produce. That CAD drawing is then used to create a CAD drawing for the mold, and additional features are added, like the plastic pathways and air vents. The CAD drawing for the mold is then converted into a CAM program, which is basically a set of instructions that tell a CNC machine exactly where to cut the metal and what tools to use. It does take a fair amount of skill and technical knowledge to successfully machine a mold, even for a prototype. So, most people usually just make a CAD drawing of the plastic part they want, then give that drawing to a machinist or moldmaker to finish the rest of the process. That said, if you do have some machining skills or desire to learn them, there's a number of very nice benchtop CNC machines on the market that are specifically designed for the hobbyist. And they keep getting more and more sophisticated and user friendly at the same time. So, its entirely possible for a person of average skill to learn how to use one of these machines to make your own molds. A mold that has simple geometry like the practice mold above (included with machine purchase) is easily made on a hobbyist type CNC machine.
This website provides a nice overview on how to machine a prototype injection mold. This company sells benchtop CNC machines.
|
Copyright 2008. All Rights Reserved.