**SAFETY FIRST** Below are only the basic steps for set-up and operation. You must always observe safe practices when using this machine (e.g. wear safety glasses and heat resistant gloves, only use in a well ventilated area and away from all flammable materials, keep a fire extinguisher nearby, etc.)
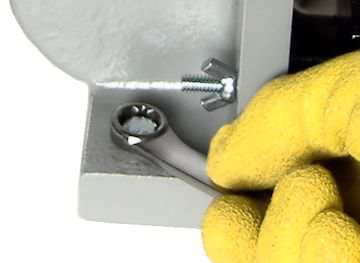
STEP 1
Mount the Model B-100 to your workbench with bolts.
STEP 2
Connect the power jumper cord and the thermocouple jumper wire between the Model B and ECB-001 controller. Then plug the power wire into the ECB-001 controller and wall socket.
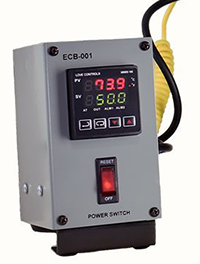
STEP 3
Turn on the controller power switch, then turn on the Model-B power switch. Adjust the P.I.D. to the desired temperature setting, then wait until the set temperature is reached.
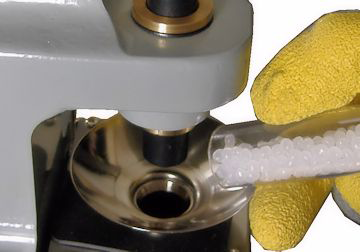
STEP 4
Pour some plastic pellets into the injection tube, filling it up. Wait until the pellets melt (~2-4 min).
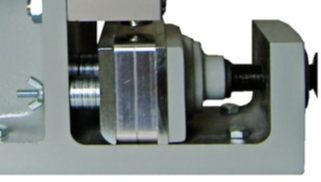
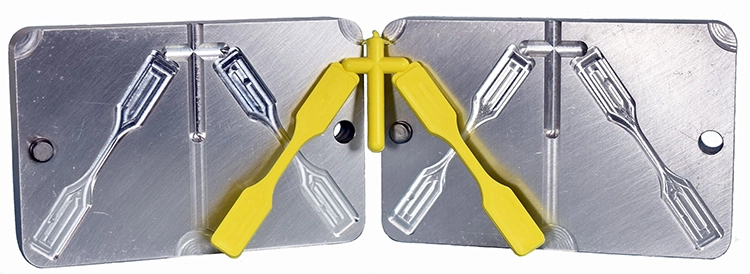
STEP 5
While waiting for the plastic pellets to melt, position the mold under the injection nozzle and clamp it into position by turning the vise handle. Notice how the backing plate has been shimmed forward with washers so the center line of the mold lines up with the injection nozzle.
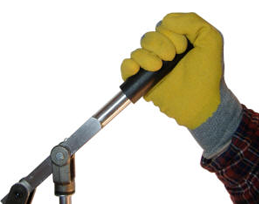
STEP 6
Pull down the handle until you feel a solid resistance. Hold it there for a few seconds, then lift the handle back up until it locks into its upright position.
IMPORTANT NOTE
It takes some practice to make nice parts. In general, you have to pull down the handle with a fairly quick and steady downward force. But not too quick, because the air trapped in the mold cavity can only be forced out of those tiny air vents so fast. Every part is different. A very small part (<1 gram) may be fully injected within a second or two and the handle will only need to be lowered a short distance before you feel the solid resistance. A larger part (5+ grams) may take 5-10 seconds or more to completely fill the mold cavity with plastic. Some parts will inject rather easily, and others will require some strength to pull down the handle, and may require using the handle extension to get better leverage. There are many variables that affect how easily a part will inject, such as the size and geometry of the part; the type of plastic used; the temperature of the plastic; the temperature of the mold; the size and configuration of the gates and runners; proper venting of the mold, etc. Just please keep in mind, this machine is not a miracle worker, if you cannot inject a part with only a moderate amount of downward force on the handle, even after optimizing the above variables, it’s probably beyond the capability of this machine. Attempting to push it beyond its limits may result in serious injury to yourself and/ or damage to the machine.
STEP 7
Loosen the vise handle to unclamp the mold. Separate the mold halves and remove your part.
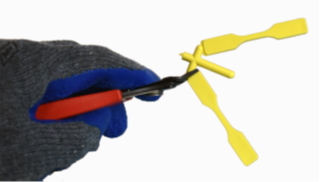
STEP 8
Cut off the sprue, and you’re done!
NOTE: To continue making more parts, repeat steps 4 through 8. If you’re finished, purge the remaining plastic from the injection tube, Turn off the Model-B power switch. Turn off the ECB-001 controller power switch, and unplug from the wall socket for added safety.